


轻量级注册中心
轻量级注册中心主要为开发者提供本地轻量级注册中心服务,为开发者提供在开发、联调、测试阶段的服务注册、发现等功能;
前提条件
在使用轻量级注册中心前,请确保:
- 环境安装JDK1.8并完成环境配置;
- 确保端口8600、8500、8301、8302和8300端口未被占用;
轻量级注册中心安装
下载
推荐您找一台机器(如本地),在保证网络环境通常的前提下,下载按照Consul注册中心;
轻量级注册中心Consul支持多种操作系统,如Windows、Linux/MacOS操作系统,请根据实际情况下载:
- Consul官网下载地址,建议您使用的版本为1.6.1版本;
- 百度智能云下载地址;
安装
端口检查
在安装Consul轻量级注册中心之前,请确保下面的端口没有被占用。
| 用途 | 默认端口 |
|---|---|
| DNS: The DNS server (TCP and UDP) | 8600 |
| HTTP: The HTTP API (TCP Only) | 8500 |
| LAN Serf: The Serf LAN port (TCP and UDP) | 8301 |
| Wan Serf: The Serf WAN port (TCP and UDP) | 8302 |
| server: Server RPC address (TCP Only) | 8300 |
安装步骤
- 将已经下载的安装包解压,解压后会发现其中包含Consul 二进制文件。
-
按照如下命令启动
Windows操作系统:
.\consul.exe agent -dev
Linux/MacOS系统:
./consul agent -dev
说明:也可将consul文件的位置加入PATH的环境变量中,方便任意位置执行命令;
3.验证是否启动,通过访问地址http://127.0.0.1:8500 来查看是否UI正常启动,正常启动后可通过UI 界面点击Nodes,观察Healthy Nodes,正常情况下会显示一个节点,且该节点为Leader节点。
使用轻量级注册中心
SDK说明
<dependency>
    <groupId>com.baidubce.formula</groupId>
    <artifactId>spring-cloud-formula-cnap</artifactId>
    <version>{version}</version>
</dependency>
其中的版本号信息version,可前往Maven仓库中查找使用最新版本。
创建服务提供者
在本地创建服务提供者应用工程,并添加依赖,开启服务注册与发现功能,并将注册中心指定为本地注册中心。
- 创建命名为provider-demo的Maven工程,JDK选择1.8。
- pom.xml中添加依赖。
<parent>
    <groupId>org.springframework.boot</groupId>
    <artifactId>spring-boot-starter-parent</artifactId>
    <version>2.0.7.RELEASE</version>
    <relativePath/>
</parent>

<dependencyManagement>
    <dependencies>
        <dependency>
            <groupId>org.springframework.cloud</groupId>
            <artifactId>spring-cloud-dependencies</artifactId>
            <version>Finchley.SR2</version>
            <type>pom</type>
            <scope>import</scope>
        </dependency>
    </dependencies>
</dependencyManagement>

<dependencies>
    <!-- 添加依赖 -->
    <dependency>
        <groupId>com.baidubce.formula</groupId>
        <artifactId>spring-cloud-formula-cnap</artifactId>
        <version>{version}</version>
    </dependency>
    <dependency>
        <groupId>org.springframework.boot</groupId>
        <artifactId>spring-boot-starter-web</artifactId>
    </dependency>
</dependencies>
这里以Spring boot 2.0.7.REALEASE 和 Spring Cloud Finchley.SR2为例,添加对应依赖。
3.创建服务提供者启动类,开启服务注册发现功能
import org.springframework.boot.SpringApplication;
import org.springframework.boot.autoconfigure.SpringBootApplication;
import org.springframework.cloud.client.discovery.EnableDiscoveryClient;

@SpringBootApplication
@EnableDiscoveryClient
public class ProviderApplication {

    public static void main(String[] args) {
        SpringApplication.run(ProviderApplication.class, args);
    }
}
4.创建简单的Controller,包含一个方法获取URL中的参数。
import org.springframework.web.bind.annotation.PathVariable;
import org.springframework.web.bind.annotation.RequestMapping;
import org.springframework.web.bind.annotation.RequestMethod;
import org.springframework.web.bind.annotation.RestController;

@RestController
@RequestMapping(value = "/echo")
public class EchoController {

    @RequestMapping(value = "/{message}", method = RequestMethod.GET)
    public String echo(@PathVariable String message) {

        return message;
    }
}
5.在src\main\resources路径下创建文件application.properties,在application.properties中添加如下配置,指定注册中心地址信息。若您未指定注册中心地址,默认地址为http://127.0.0.1:8500。
spring.application.name=provider-demo
server.port=10001

# 默认注册中心地址信息如下,若您部署在其他机器,请更换为对应机器地址信息
formula.discovery.host=http://127.0.0.1
formula.discovery.port=8500
6.验证结果
i)启动ProviderApplication中main函数;
ii)访问注册中心控制台 http://127.0.0.1:8500;
iii)在顶部选择Services即可查看对应注册的服务信息,可以看到服务列表中已经包含了provider-demo,且点击服务名可在详情中可以查询该服务的详情;
创建服务消费者
在本地创建服务消费者应用工程,并添加依赖,开启服务注册与发现功能,并将注册中心指定为本地注册中心。
同时分别通过RestTemplate、FeignClient这两种方式去调用服务提供者。
- 创建命名为consumer-demo的Maven工程,JDK选择1.8。
- pom.xml中添加依赖。
<parent>
    <groupId>org.springframework.boot</groupId>
    <artifactId>spring-boot-starter-parent</artifactId>
    <version>2.0.7.RELEASE</version>
    <relativePath/>
</parent>

<dependencyManagement>
    <dependencies>
        <dependency>
            <groupId>org.springframework.cloud</groupId>
            <artifactId>spring-cloud-dependencies</artifactId>
            <version>Finchley.SR2</version>
            <type>pom</type>
            <scope>import</scope>
        </dependency>
    </dependencies>
</dependencyManagement>

<dependencies>

    <!-- 添加依赖 -->
    <dependency>
        <groupId>com.baidubce.formula</groupId>
        <artifactId>spring-cloud-formula-cnap</artifactId>
        <version>{version}</version>
    </dependency>
    <dependency>
        <groupId>org.springframework.boot</groupId>
        <artifactId>spring-boot-starter-web</artifactId>
    </dependency>
    <dependency>
        <groupId>org.springframework.cloud</groupId>
        <artifactId>spring-cloud-starter-openfeign</artifactId>
    </dependency>
</dependencies>
这里以Spring boot 2.0.7.REALEASE 和 Spring Cloud Finchley.SR2为例,添加对应依赖。
3.创建服务消费者启动类,开启服务注册发现功能
import org.springframework.boot.SpringApplication;
import org.springframework.boot.autoconfigure.SpringBootApplication;
import org.springframework.cloud.client.discovery.EnableDiscoveryClient;
import org.springframework.cloud.client.loadbalancer.LoadBalanced;
import org.springframework.cloud.openfeign.EnableFeignClients;
import org.springframework.context.annotation.Bean;
import org.springframework.web.client.RestTemplate;

@SpringBootApplication
@EnableDiscoveryClient
@EnableFeignClients
public class ConsumerApplication {

    @LoadBalanced
    @Bean
    public RestTemplate restTemplate() {
        return new RestTemplate();
    }

    public static void main(String[] args) {
        SpringApplication.run(ConsumerApplication.class, args);
    }
}
如上需要额外添加@EnableFeignClients注册激活FeignClient,添加@LoadBalance注解将RestTemplate与服务发现集成
4.创建FeignClient接口
import org.springframework.cloud.openfeign.FeignClient;
import org.springframework.web.bind.annotation.PathVariable;
import org.springframework.web.bind.annotation.RequestMapping;
import org.springframework.web.bind.annotation.RequestMethod;

@FeignClient(name = "provider-demo")
public interface EchoService {
    @RequestMapping(value = "/echo/{message}", method = RequestMethod.GET)
    String echo(@PathVariable("message") String message);
}
其中:FeignClient的名称provider-demo为服务提供者工程中配置的服务名(spring.application.name)
5.创建简单的Controller,包含一个方法获取URL中的参数。
import org.springframework.beans.factory.annotation.Autowired;
import org.springframework.web.bind.annotation.PathVariable;
import org.springframework.web.bind.annotation.RequestMapping;
import org.springframework.web.bind.annotation.RequestMethod;
import org.springframework.web.bind.annotation.RestController;
import org.springframework.web.client.RestTemplate;

@RestController
public class EchoController {

    @Autowired
    private RestTemplate restTemplate;

    @Autowired
    private EchoService echoService;

    @RequestMapping(value = "/echo-rest/{message}", method = RequestMethod.GET)
    public String rest(@PathVariable String message) {
        return restTemplate.getForObject("http://provider-demo/echo/" + message, String.class);
    }

    @RequestMapping(value = "/echo-feign/{message}", method = RequestMethod.GET)
    public String feign(@PathVariable String message) {
        return echoService.echo(message);
    }
}
6.在src\main\resources路径下创建文件application.properties,在application.properties中添加如下配置,指定注册中心地址信息。若您未指定注册中心地址,默认地址为http://127.0.0.1:8500。
spring.application.name=consumer-demo
server.port=9999

# 默认注册中心地址信息如下,若您部署在其他机器,请更换为对应机器地址信息
formula.discovery.host=http://127.0.0.1
formula.discovery.port=8500
7.验证结果
i)启动ConsumerApplication中main函数;
ii)访问注册中心控制台 http://127.0.0.1:8500;
iii)在顶部选择Services即可查看对应注册的服务信息,可以看到服务列表中已经包含了consumer-demo,且点击服务名可在详情中可以查询该服务的详情;
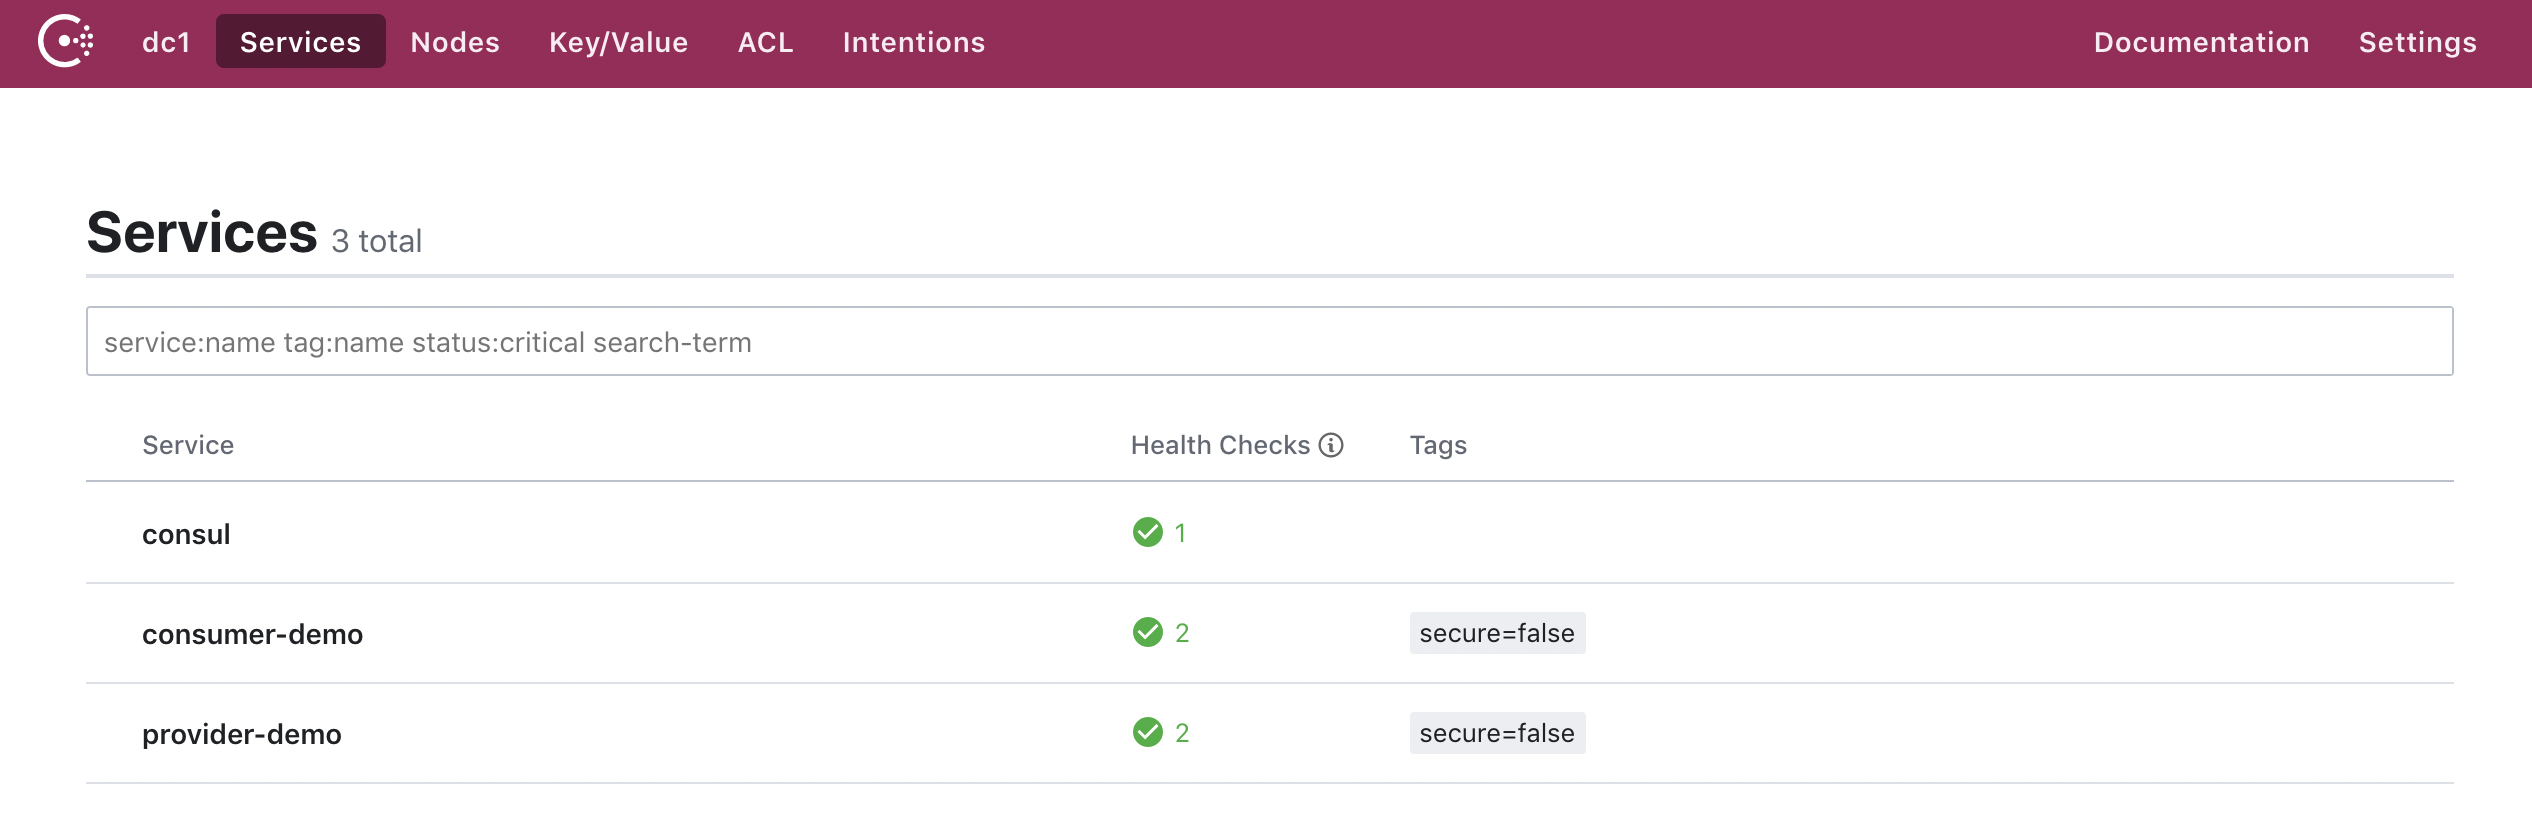
本地测试
上述步骤完成后,通过查看轻量级注册中心页面(http://127.0.0.1:8500/ui/dc1/services ),如下图,显示已经注册的consumer-demo和provider-demo服务。
在本地测试消费者对提供者的服务调用情况,如下:
- Linux/MacOS系统:
curl http://localhost:9999/echo-rest/hello
curl http://localhost:9999/echo-feign/hello
- Windows系统: 您可在浏览器中输入 http://localhost:9999/echo-rest/hello 、http://localhost:9999/echo-feign/hello 查看结果